Follow Me On Social Media!

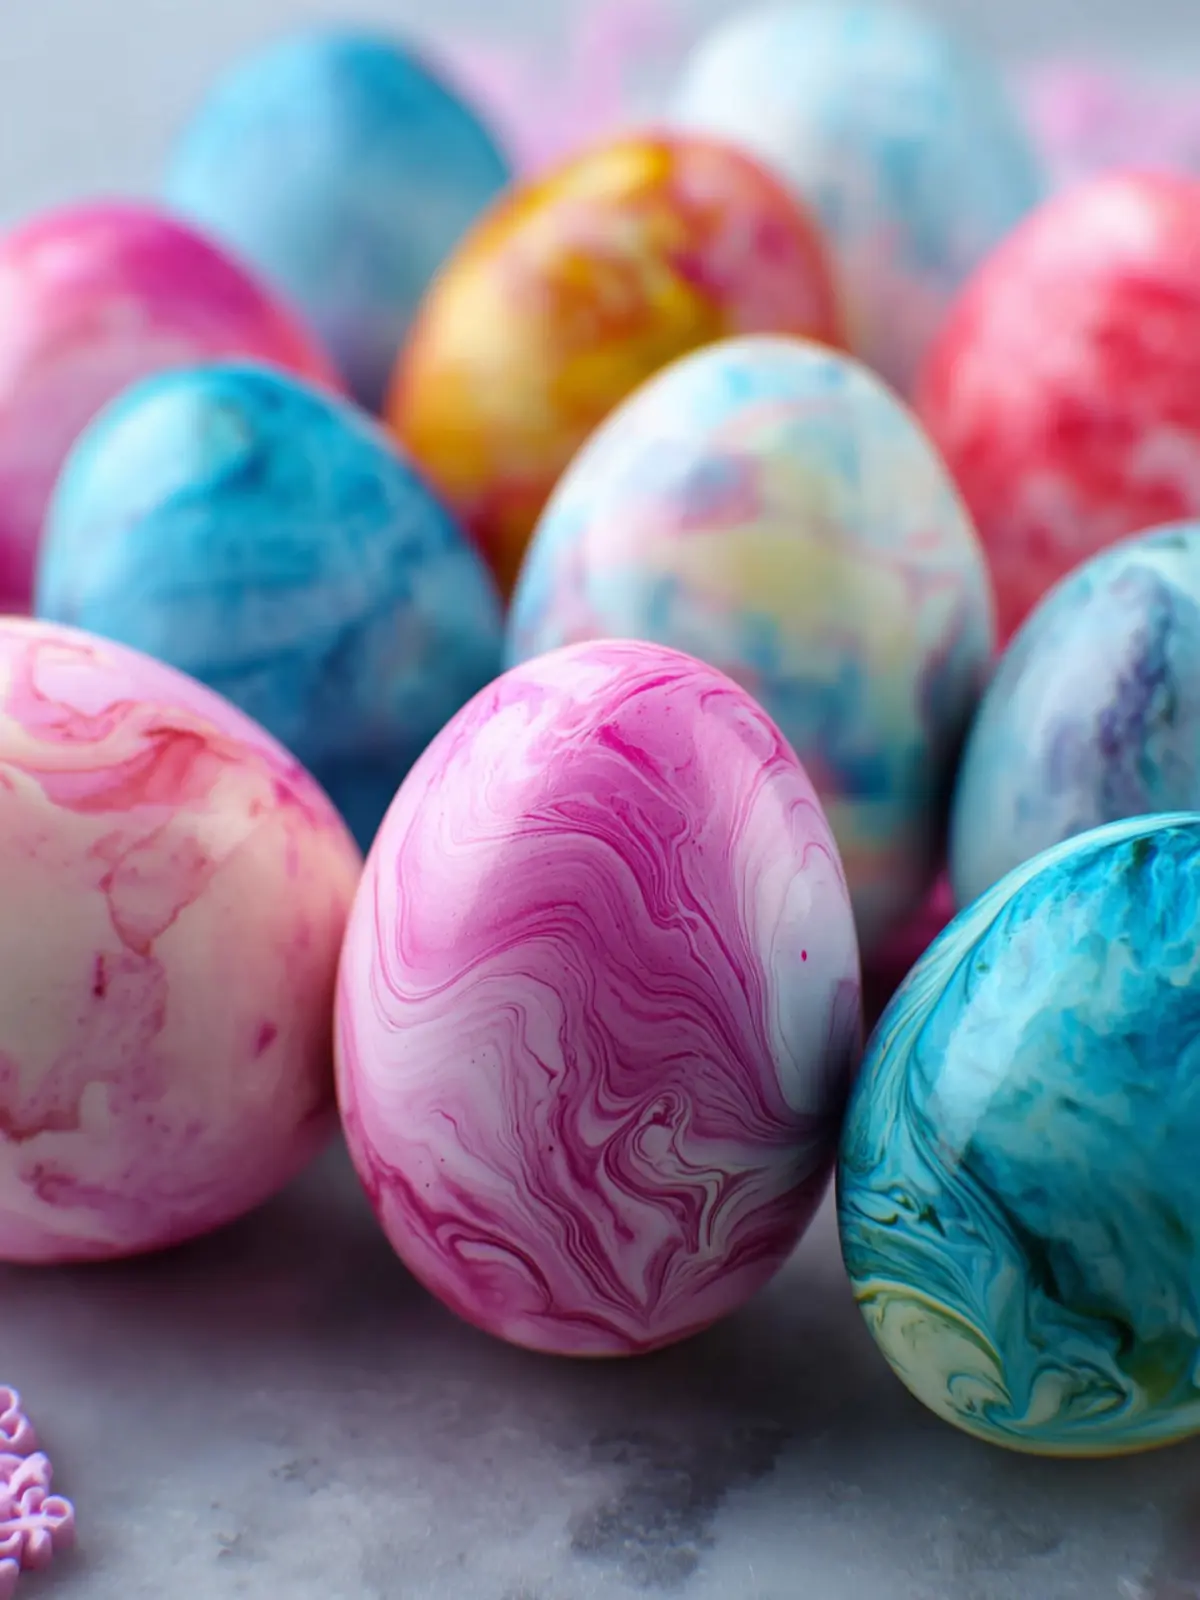
Shaving Cream Dyed Easter Eggs: Easy, Colorful Fun for All!
Introduction to Shaving Cream Dyed Easter Eggs
Creating shaving cream dyed Easter eggs is a delightful way to spark creativity and bring your family together. Picture this: a sunny day, laughter echoing around the kitchen, as you and your loved ones gather around the table, armed with eggs and an array of colors. This charming DIY activity not only delivers vibrant results but also offers a unique, hands-on approach to a cherished holiday tradition.
The allure of decorating Easter eggs at home lies in the joy of personalization. It’s a chance to push the boundaries of conventional egg coloring methods and dive into a fun, artsy adventure. The intrigue of using shaving cream—an everyday item—adds a layer of excitement, turning a simple activity into something truly special. Plus, the process can be just as enjoyable as the final product, creating memories that last long after the Easter festivities have ended.
Why DIY Easter Egg Decorating is a Fun Family Tradition
Engaging in DIY Easter egg decorating, especially with techniques like our shaving cream dyed Easter eggs, brings several benefits to families:
-
Creative Expression: Everyone can showcase their personality through their choice of colors and designs. Children and adults alike can unleash their inner artists, creating beautiful, one-of-a-kind designs.
-
Bonding Time: It provides a perfect opportunity for families to spend quality time together. Whether it’s laughing over spilled dye or sharing decorating tips, the memories made during the process are priceless.
-
Learning Experience: Beyond just decoration, it incorporates learning elements, such as color mixing and pattern creation. It’s a fun science experiment in disguise!
-
Tradition Building: Making it a yearly affair helps establish family traditions that future generations can cherish. Each year, families can reflect on their past creations and build on them, adding a personal touch.
So grab your supplies and get ready to make some mesmerizing shaving cream dyed Easter eggs. You’ll not only end up with stunning decorations but also a treasure trove of joyful family memories!

Key Ingredients for Shaving Cream Dyed Easter Eggs
Shaving cream dyed Easter eggs offer a creative twist on the traditional Egg Hunt, bringing a splash of color and fun to your festivities. To achieve this vibrant aesthetic, you’ll need a few essentials from your pantry.
-
Shaving Cream: The star of this technique! Opt for a non-mentholated, white shaving cream—this ensures the colors from your dye stand out vibrantly without any interference. Plus, it adds a lovely, soft texture to the eggs that makes them feel unique!
-
Food Coloring: Choose gel food coloring for the brightest, most vivid results. The deeper hues will mix beautifully, giving your eggs a swirled, watercolor effect. You can combine colors for custom shades or stick to your favorites.
-
White Eggs: While any egg can technically work, white eggs are best as they showcase the colors more strikingly. Fresh, room-temperature eggs are ideal for ensuring your dye adheres well.
-
Vinegar: Though optional, using a vinegar rinse before dyeing can help the colors hold better due to its acidic nature. Just a quick dip can make a big difference!
With these key ingredients, you’ll craft stunning and colorful eggs that will be the talk of your Easter celebration!
Why You’ll Love This Recipe
Crafting shaving cream dyed Easter eggs is more than just a festive activity; it’s a delightful blend of creativity and nostalgia that brings joy to all ages. Picture this: you gather around a table with your friends or family, laughter filling the air, as you experiment with colors and patterns that remind you of cherished childhood memories.
A Unique Twist on Tradition
What makes this recipe special is its playful combination of simple ingredients and playful techniques. Using shaving cream creates mesmerizing designs, ensuring each egg becomes a unique work of art. The process is incredibly engaging, allowing everyone to unleash their inner artist!
- Simple and Fun: Easily involve kids, making it a wonderful family bonding experience.
- Vibrant Colors: The vivid hues of the dye contrast beautifully with the creamy backgrounds, leading to stunning results.
- Minimal Cleanup: Unlike traditional dyeing methods, the mess is contained, making it less stressful for everyone involved.
Perfect for Any Occasion
Beyond Easter, these shaving cream dyed Easter eggs can serve as gorgeous decorations for spring gatherings, parties, or even as thoughtful gifts. This beautiful, easy, and enjoyable recipe will have everyone eager to join in. Come create lasting memories that twinkle brighter than any Easter egg hunt!
Variations for Shaving Cream Dyed Easter Eggs
Exploring shaving cream dyed Easter eggs can lead to truly creative and beautiful results. The base technique is simple, but what if you could mix it up a bit? Here are some engaging variations to consider that will keep the tradition fresh and individual.
Different Color Combinations
-
Pastel Palette: Instead of vibrant colors, opt for a softer pastel palette. Use food coloring that leans towards lighter shades, mixing carefully to create gentle hues. This can result in a dreamy, vintage look on your eggs.
-
Metallic Touches: Add a hint of fun by incorporating metallic food coloring into your shaving cream mix. A subtle shimmer can elevate your Easter eggs, making them shine like little treasures.
Patterns and Techniques
-
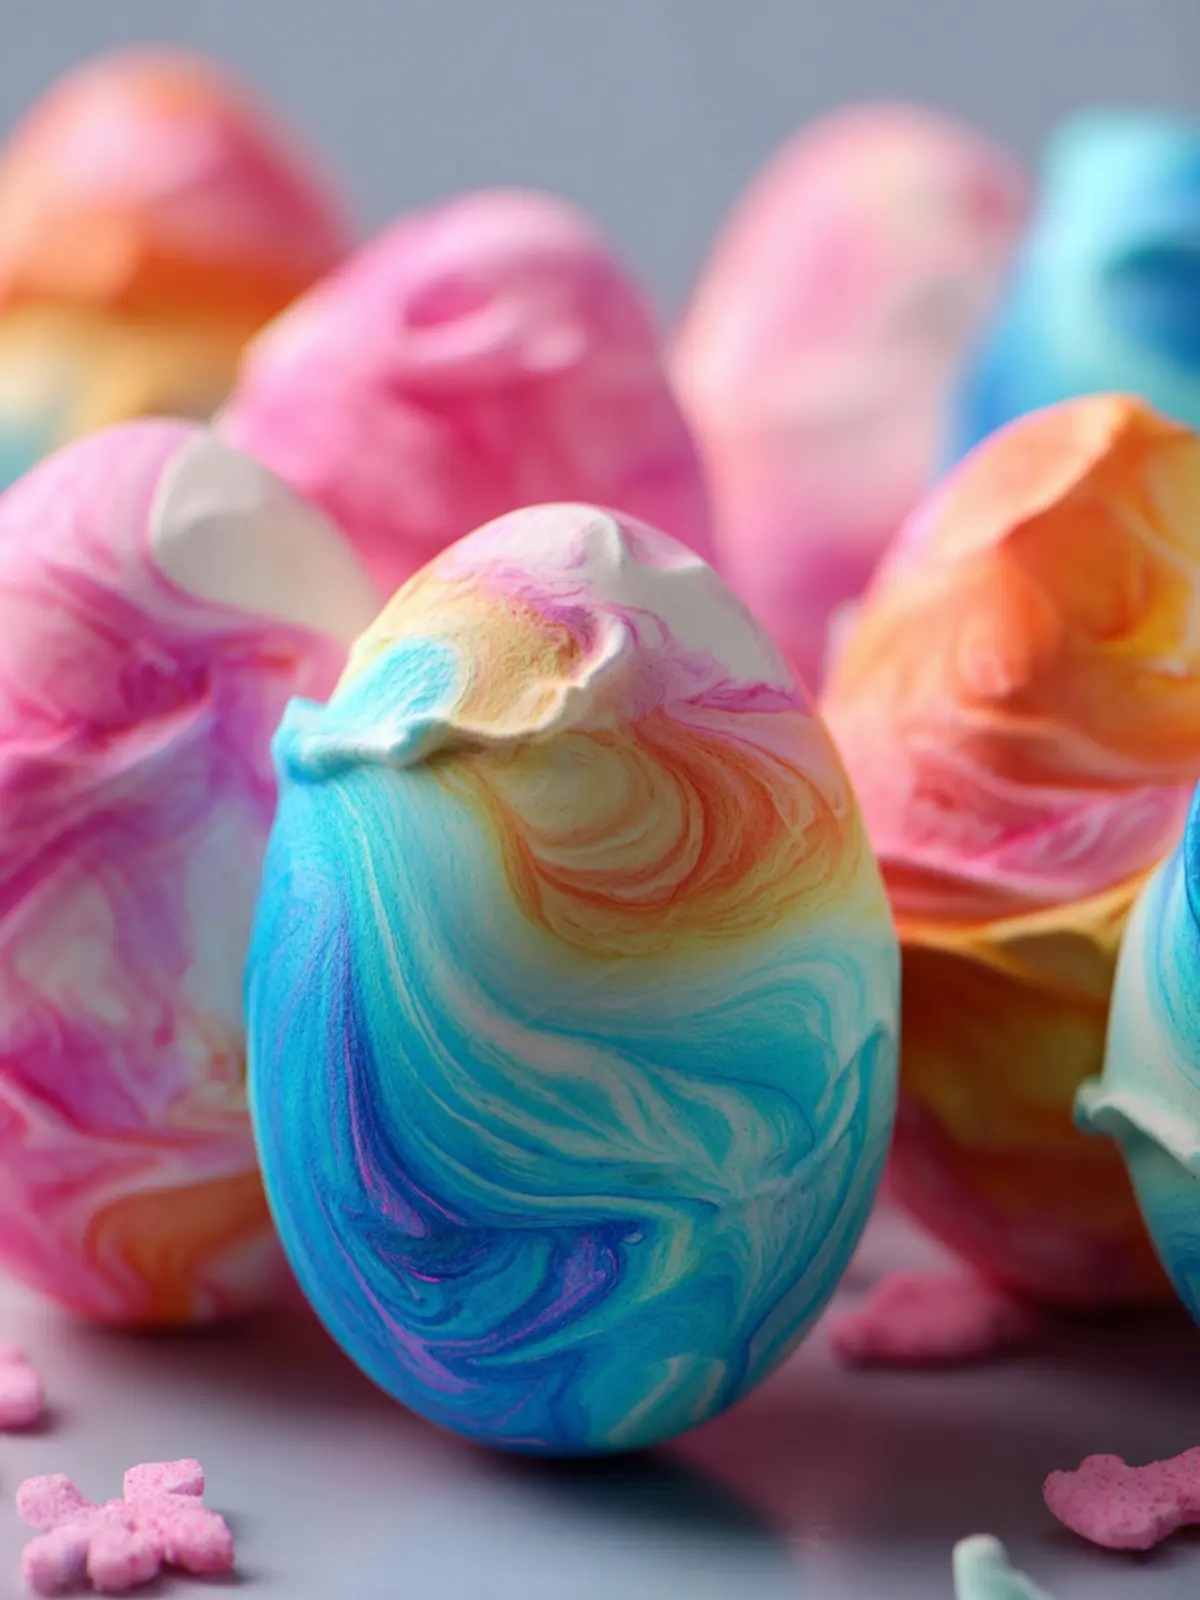
Swirling Techniques: Instead of just drizzling the colors, use a toothpick or skewer to create swirls and marbled effects. This technique enhances the visual appeal and makes each egg uniquely beautiful.
-
Nature-Inspired Designs: Experiment with leaves or flowers by using the shaving cream to press these natural elements onto the eggs. The result? Gorgeous, organic patterns reminiscent of spring.
Egg Types
- Hard-Boiled vs. Faux Eggs: While traditional hard-boiled eggs are popular, don’t shy away from using faux eggs. They provide a durable option that can be reused year after year, allowing you to experiment without the risk of breakage.
By integrating these variations into your shaving cream dyed Easter eggs, you can create a personalized and festive experience perfect for family gatherings or creative gatherings with friends. Happy crafting!
Cooking Tips and Notes for Shaving Cream Dyed Easter Eggs
Creating shaving cream dyed Easter eggs is not only a delightful craft for the whole family but also an art form that invites creativity and fun. Having experimented with this technique, I’ve gathered a few tips that can help you achieve vibrant and mesmerizing results.
Choosing the Right Eggs
- Use White Eggs: Fresh white eggs give the best results when dyeing. They allow colors to appear vivid and striking against the contrasting background.
- Hard Boil Properly: To prevent cracks during the dyeing process, ensure your eggs are boiled well. A gentle simmer works wonders!
Perfecting the Dyeing Process
- Swirl the Dye: When you apply the shaving cream, be playful with your colors! The swirls you create will impact the final design of your eggs.
- Patience Is Key: Let the eggs sit in the dye mixture for at least 10-15 minutes to absorb the hues deeply. The longer they sit, the richer the color.
Cleaning Up
- Wear Gloves: Things can get a bit messy, so don’t forget to wear gloves! This will protect your hands from getting stained.
- Use a Clean Workspace: Cover your table with newspapers or an old tablecloth to easily clean up afterward.
With these tips in your back pocket, you’re geared up for a colorful day of crafting shaving cream dyed Easter eggs. Enjoy the process, make it a family affair, and let your creativity shine!
Serving Suggestions for Shaving Cream Dyed Easter Eggs
Transforming your ordinary Easter celebration into a vibrant spectacle is effortless with shaving cream dyed Easter eggs. Not only are these eggs a feast for the eyes, but they also lend a playful twist to traditional egg decorating. Here are some delightful serving suggestions to enhance your Easter festivities.
Create an Eye-Catching Centerpiece
Arrange your beautifully dyed eggs in a shallow basket or decorative bowl. Adding a touch of greenery or flowers, like spring tulips or ivy, can elevate the presentation, making it a stunning centerpiece for your dining table.
Easter Egg Hunt Attraction
If you’re hosting an egg hunt, these shaving cream dyed Easter eggs can lead to some exciting surprises. Hide them around the garden or yard, encouraging kids (and adults!) to search for their colorful treasures. The visual appeal will make the hunt even more enjoyable.
Pair with Creative Desserts
Consider serving your dyed eggs alongside festive desserts like carrot cake or lemon tarts. The vivid colors of your eggs will complement the treats, creating a cheerful dessert table that invites guests to indulge.
Fun for All Ages
Finally, use these eggs in crafts and activities. For example, they can double as playful decorations for gift baskets or contribute to a fun arts and crafts afternoon, igniting creativity in everyone.
Embrace the joy of shaving cream dyed Easter eggs this season, and watch as they bring color and laughter to your celebration!
Time Breakdown for Shaving Cream Dyed Easter Eggs
Creating shaving cream dyed Easter eggs is an enriching experience, filled with colorful creativity and festive spirit. To make the most of your time, here’s how the process breaks down:
Preparation time
You’ll need about 15 minutes to gather your materials and prepare your workspace. This includes mixing the dyes in your shaving cream and setting up all your eggs and tools.
Dyeing time
The actual dyeing part takes approximately 30 minutes. You’ll be gently swirling your eggs in the shaving cream and allowing the colors to settle and blend for stunning effects.
Total time
In all, you’re looking at rounded 45 minutes of engaging activity. In no time, you’ll unveil vibrant, uniquely dyed Easter eggs that are not only visually striking but also a joy to create!
By breaking down your time, you can enjoy the process and make it a fun tradition with friends or family.
Nutritional Facts for Shaving Cream Dyed Easter Eggs
When it comes to making shaving cream dyed Easter eggs, many might wonder about the nutritional aspects, especially when planning festive gatherings or family activities. While the focus is typically on the colorful fun and creativity, it’s always nice to be informed about what you’re handling.
Calories
Surprisingly, shaving cream dyed Easter eggs don’t contribute significant calories to your diet, as the dyeing process only involves eggs and edible coloring agents. Each egg contains roughly 70 calories, primarily from the egg itself.
Protein
Eggs are a fantastic source of protein. Each egg can provide about 6 grams of protein, making them a nutritious option for snacking, even after they’ve been dyed. The protein in eggs is crucial for muscle repair and growth, ideal for active young professionals.
Sodium
When it comes to sodium, a single hard-boiled egg contains about 70 mg. If you enjoy seasonal egg dishes after decorating, consider that too much sodium can be a factor to watch, particularly if mixing in additional ingredients later.
Overall, shaving cream dyed Easter eggs not only bring joy and creativity to your celebrations but also pack a nutritious punch if you choose to enjoy them post-festivities.
FAQ about Shaving Cream Dyed Easter Eggs
Dive into the colorful world of shaving cream dyed Easter eggs, where creativity meets tradition! Many of us have fond memories of decorating eggs, but this unique method infuses a playful twist that’s both fun and artistic. As you embark on this journey of vibrant colors, you might have a few questions about the process and its outcomes. Let’s address some common inquiries.
Can I eat the dyed eggs?
While the shaving cream itself isn’t harmful, the dye may not be food-safe. If you’re planning to enjoy your Easter eggs as a snack after decorating, it’s advisable to use food-safe dyes and handling practices. For safety, hard-boiled eggs can last for about one week if stored properly in the refrigerator.
How long do the dyed eggs last?
The longevity of your shaving cream dyed Easter eggs depends on how you store them. If kept in the fridge, dyed eggs can typically last up to one week. Remember to check for any signs of spoilage before consuming them after a few days. If you plan to keep them as decorative pieces and not eat them, they may last longer at room temperature, though they are best enjoyed fresh.
Can I use other types of dye?
Absolutely! While traditional food coloring is popular, you can experiment with natural dyes such as beet juice, turmeric, or spinach for beautiful, eco-friendly results. Just keep in mind that the vibrancy may differ with natural dyes compared to commercial food coloring. Don’t be afraid to get creative and see what unique shades you can achieve!
Now that you’re equipped with the essential knowledge, gather your supplies and enjoy the whimsical process of creating shaving cream dyed Easter eggs!
Conclusion on Shaving Cream Dyed Easter Eggs
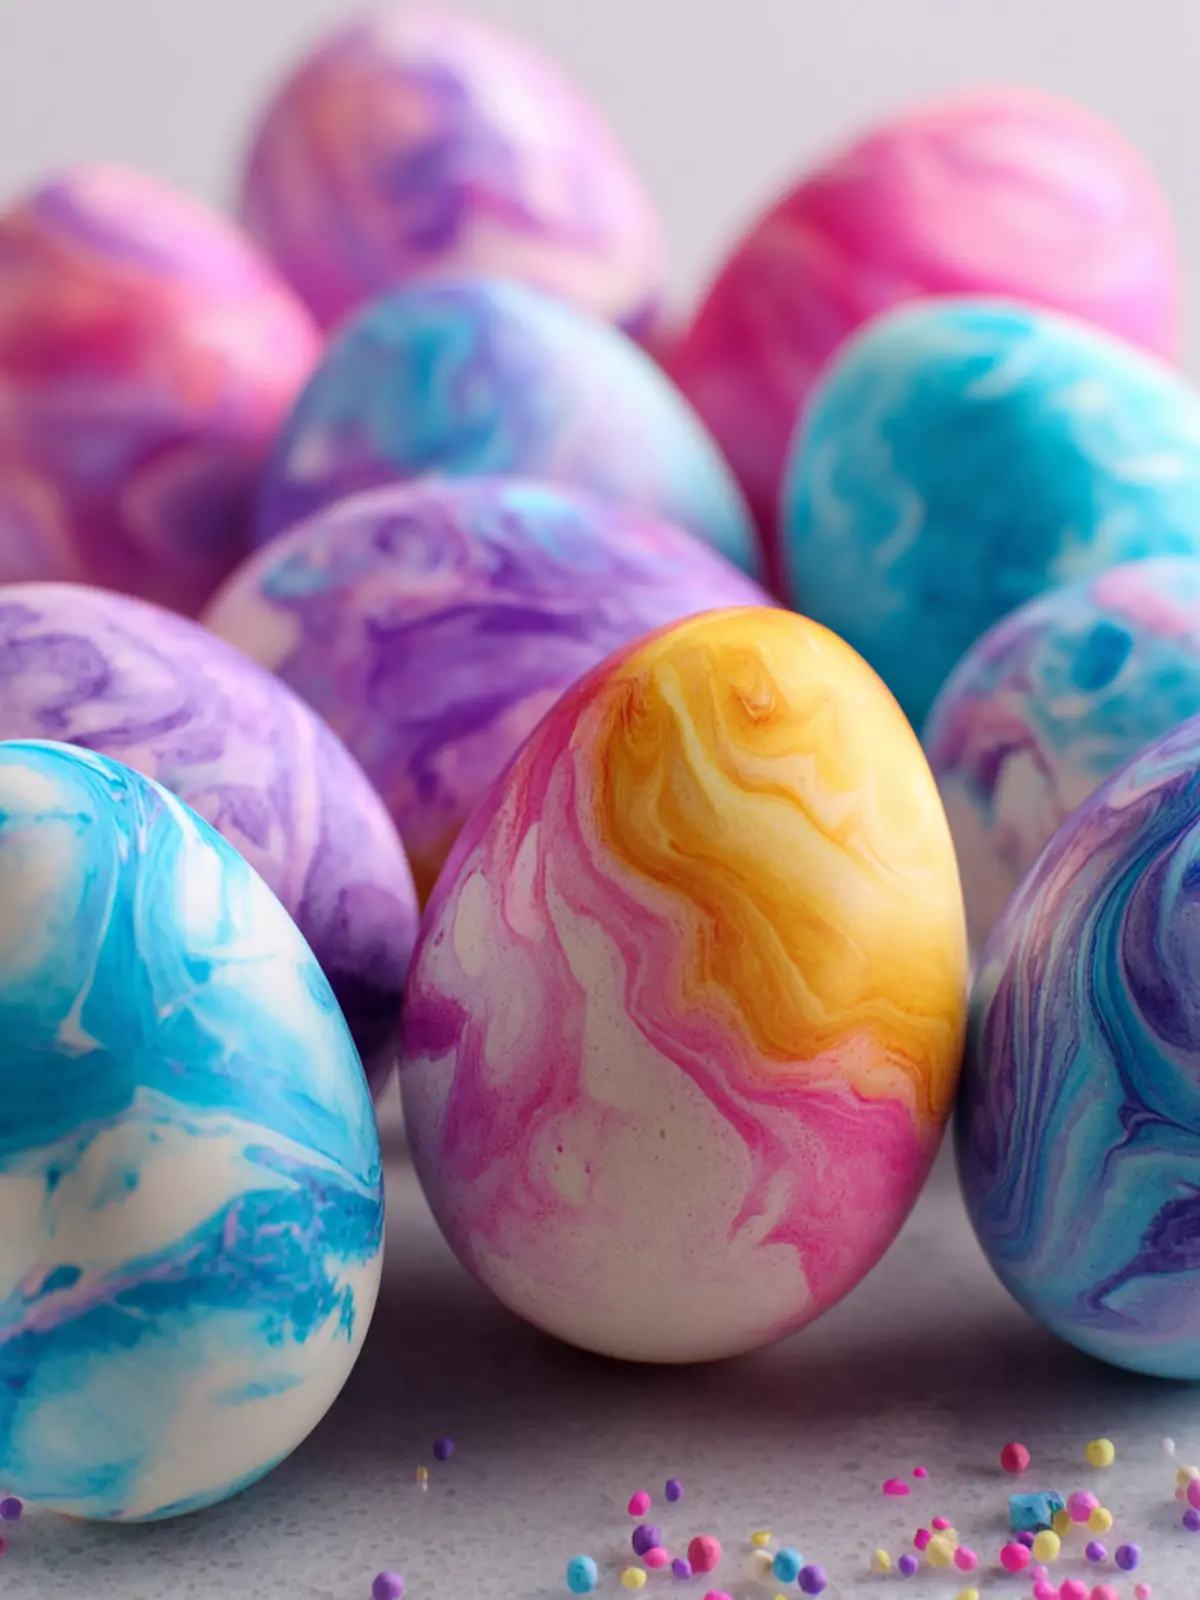
Creating shaving cream dyed Easter eggs is not just a fun holiday activity; it’s a wonderful way to engage your creativity while making a family tradition. The vibrant colors you achieve through this simple technique make each egg a unique masterpiece. As you layer the shaving cream and dye, you’re not just decorating; you’re forging memorable moments with your loved ones. Remember to have fun with the process, let the eggs sit in the dye for a bit longer if you want more intensity, and don’t be afraid to get a little messy! Your gorgeous, marbled eggs will surely be a conversation starter during any Easter gathering.
Print
Colored Hard-Boiled Eggs
- Total Time: 25 minutes
- Yield: 1 dozen eggs 1x
- Diet: Vegetarian
Description
Learn how to create beautiful colored hard-boiled eggs using simple ingredients!
Ingredients
Scale
- 1 container hard-boiled eggs
- Shaving cream
- 1/2 cup white distilled vinegar
- Water-based liquid food dye
Instructions
- Prepare Eggs: Soak boiled eggs in vinegar for 10 minutes, then remove, pat dry, and let fully dry.
- Set Up Dye: Fill each muffin tin section with shaving cream. Add 2 drops of liquid dye (or 1 drop of gel dye) per section. Swirl with a toothpick.
- Dye Eggs: Wearing gloves, roll eggs in the shaving cream until fully covered. Let sit for 10-15 minutes.
- Rinse & Dry: Gently rinse without rubbing and place on paper towels to dry.
Notes
- For best results, use fresh eggs.
- Ensure eggs are completely dry before rolling in shaving cream.
- You can mix different colors in the shaving cream for unique patterns.
- Prep Time: 15 minutes
- Category: Dessert
- Method: No-Cook
- Cuisine: American
Nutrition
- Serving Size: 1 egg
- Calories: 70
- Sugar: 0
- Sodium: 60mg
- Fat: 5g
- Saturated Fat: 1.5g
- Unsaturated Fat: 3g
- Trans Fat: 0g
- Carbohydrates: 1g
- Fiber: 0g
- Protein: 6g
- Cholesterol: 186mg